Cracks are inherent to concrete, but can be controlled and
even eliminated if you understand why they occur.
We’ve all heard it: Concrete always cracks! Although that’s
not 100% true, concrete does crack frequently enough that anyone working with
it should understand why and how to repair cracks when necessary. Don’t let
cracks ruin your good work!
Cracks form in a slab when there is a tension force in the
concrete that’s greater than the concrete’s strength in tension. Concrete’s
direct tensile strength is much less than its compressive strength—about 10%.
So when it’s pulled too hard, it cracks. Cracks also can propagate, or continue
to grow, at even lower stresses. The tension can have of a lot of causes that
are external or inside the concrete itself, such as internal pressure caused by
freezing water or expanding aggregates.
In many cases, cracks don’t detract from performance.
Plastic shrinkage cracks in a slab’s surface often have no negative effect on
performance and may be objectionable only because the owner doesn’t like the
way they look. Shrinkage cracks that aren’t offset vertically or are unstable
under heavy loads are really nothing more than natural contraction joints. And
reinforced concrete actually needs to crack before the reinforcement begins to
work, although with heavy reinforcement the cracks can be too narrow to easily
see.
This article looks only at cracking in slabs, not concrete
disintegration such as from freeze-thaw action or alkali-silica reaction (ASR).
Those situations certainly do crack concrete, but that’s another article for
another day.
Cracking of Plastic
Concrete
After concrete is mixed and before it gets completely hard, it’s referred to as
“plastic.” The most common cracks in plastic concrete are plastic shrinkage
cracks and crazing. These are caused by the surface drying out faster than the
underlying concrete—when the evaporation rate on the surface, due to dry or
windy conditions, is greater than the bleeding. Very shallow plastic shrinkage
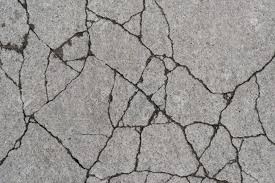
cracks form as parallel lines. Crazing cracks that create a fine map or
alligator pattern are similar but start after the finishing operation. Neither
typically has a negative impact on slab performance but may be objectionable
due to aesthetics.
Plastic shrinkage cracks often form between strike-off and
finishing, and can usually be avoided by using plastic sheets or burlap,
windbreaks, shading, fog sprays, and monomolecular evaporation retarders to
keep the surface from drying out. Similar precautions can prevent crazing or
just get the curing started as soon as possible. Don’t overwork the surface and
never “bless” the concrete with water during troweling.
Settlement cracks are also common. They form directly above
reinforcing bars in the slab and are due to the concrete continuing to settle
below the bar. Vibration can be one cause of these cracks, which get worse for
larger bars.
Both plastic shrinkage cracks and settlement cracks can be
reduced or eliminated by using synthetic microfibers in the mix.
So how can you repair these cracks? You can’t, not really.
The surface could be ground deep enough to remove them or an overlay can be
placed to cover them up. The best solution may be to convince the owner that
crazing is a special decorative treatment you provide for free!
Drying Shrinkage
Cracking
The most common cracks in slabs are random drying shrinkage cracks. After
placement, as the concrete dries out, it shrinks about 0.06% but the concrete’s
capacity to resist this is only about 0.015%. The cracks form because of
restraint – anything that prevents the slab from moving freely, such as the
subgrade, creates restraint. If we could magically suspend the slab in midair
or place it on a perfectly flat slip sheet that had zero friction, much
cracking could be avoided. (Someone needs to invent a way to levitate the slab
until it’s done shrinking.)
The degree of cracking is controlled by the amount of
shrinkage, sometimes called shrinkage potential. Shrinkage potential can be
minimized by reducing the amount of water in the mix and by using larger, and
low-shrinkage, aggregate. Don’t add any more water than absolutely necessary to
place the slab because a little bit of extra water can result in lots of extra
cracks. Think of it as liquid cracks! Shrinkage-reducing admixtures can also
help. Good curing practices produce a stronger, crack-free surface but,
unfortunately, don’t reduce the ultimate shrinkage and therefore don’t reduce
drying shrinkage cracks.
In typical concrete placed in a strip, like a sidewalk,
shrinkage cracks will form in the transverse direction about every 15 feet.
This is why we put in contraction joints (sometimes called control joints),
which are nothing but controlled cracks. The joint creates a thinner, and
therefore weaker, cross section so that’s where the crack goes. Properly tooled
or sawed contraction joints, installed at the right time and at the right
depth, will force the cracks to stay in the joints. Today, floors are being
placed without joints or with very widely spaced joints (see “Floors Without Joints” on page 25 of our
September/October 2018 issue).
For a typical interior floor, contraction joints should be
installed at the column lines, then intermediate joints can be equally spaced
between. The old standard for the spacing of contraction joints in feet is the
slab thickness in inches times 2 or 3—so for a 5-inch slab, the joints would be
between 10 feet and 15 feet apart. Always try to keep the panels as square as
possible (aspect ratio), but never have one dimension more than 1.5 times the
other.
Joints can be tooled in or sawed. Depth should be at least a
quarter of the slab thickness or 1 inch minimum. Install them as soon as
possible without messing up the surface—about 4 hours after finishing in hot
weather and up to 12 hours in cold weather. For early-entry sawing (for
example, Husqvarna Construction Products’ Soff-Cut), joints should
be 1 inch deep (never more than 1.25 inches) and installed as soon as the surface
doesn’t ravel, which is usually 1 hour to 4 hours after finishing. Timing is
critical—wait too long and the natural shrinkage cracks will beat you to the
punch.
Cracking Due to Other
Causes
Two other common causes of slab cracks are settlement of the soil support
system and overloading. A proper subbase is essential for crack-free success
(see “Subgrades
and Subbases for Slabs”). Overloading often occurs during construction when
the slab may not have achieved its full strength. A parking lot intended for
passenger cars that ends up being driven on by heavy trucks, for example, will
often suffer overloading cracks.
Repairing Cracks
In many, perhaps most, cases, random drying shrinkage cracks function just as
well as contraction joints; they just look bad and the edges can become broken
down so the crack looks worse than it actually is. But owners usually want some
sort of repair, so start by evaluating the cause and repair options.
First measure the crack widths and determine if there’s
reinforcing steel running through the crack. Use a crack comparator to measure
the width. Cracks less than about 0.035-inch will transfer loads from aggregate
interlock and prevent vertical offset. Wider cracks could offset vertically,
requiring grinding on one side. If reinforcing steel was used in the slab, the
crack will stay tight and not move but it will still be a crack.
There’s really no perfect fix. Assuming the subbase support
system was properly consolidated (not always a good assumption!), the edges of
the crack will stay level and the best fix may just be cosmetic. If the slab is
subjected to heavier loads, the crack may move and the edges degrade, necessitating
a structural repair.
If a structural repair is needed, the typical approach is to
rout the crack, clean it as well as possible, and inject epoxy to bond the
crack back together (see “Epoxy Injection of Cracked Slabs”). If the subbase isn’t
supportive enough, that could require re-establishing the support. A good
option for this is using polyurethane (see “Lifting Slabs with Polyurethane”). If more positive load
transfer at a crack is needed, stitches can be placed perpendicular to the
crack (see “Carbon Fiber Crack Repair” sidebar).
For nonstructural repairs, the typical approach is to rout
the crack with a crack chaser and fill it with a semirigid joint filler. But
you should evaluate first to determine if the crack is moving. If it is, a
flexible material is best—it won’t support the edges of the cracks like a rigid
filler, but it will move a little so the elastomeric material won’t crack.
You’ll need to widen and deepen the crack a bit to create a reservoir for the
sealant so there’s enough material to tolerate movement (see “Crack Evaluation and Repair” for more tips on
selecting repair materials).
If your objective is to make the crack look good after the
repair, consider not enlarging the crack and using a very-low-viscosity filler.
Some of these materials can be colored to match your slab, especially appealing
when working with colored concrete.
Cracks are basically an inherent characteristic of concrete,
but they can be controlled and even eliminated by understanding the causes.
For more information, get American Concrete Institute (ACI)
reports “Causes, Evaluation, and Repair of Cracks in Concrete Structures, ACI
224.1R-07;” “Control of Cracking in Concrete Structures, ACI 224R-01;” and
“Guide to Concrete Floor and Slab Construction, ACI 302.1R-15.” Another great
reference is “Concrete Repair and Maintenance Illustrated” by Peter H. Emmons.